Use the Solo Wemmbu Setup
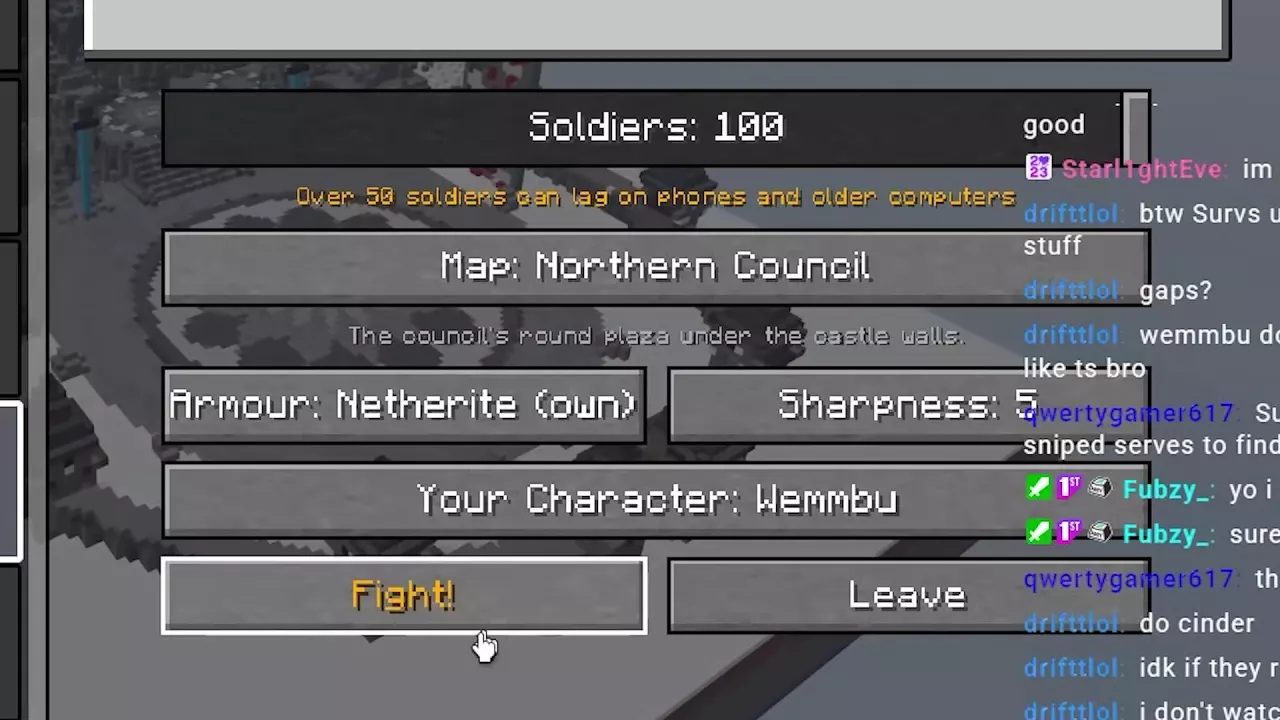
Enter Simulator, choose Solo, and select Cindercrest. Configure the battle as follows before pressing Fight!:
| Setting | Selection |
|---|---|
| Map | Northern Council |
| Soldiers | 100 |
| Your Character | Wemmbu |
| Armour | Netherite (own) |
| Sharpness | 5 (own) |
Cindercrest is a Hard army. Its Knights wear Netherite armor with redstone Silence trims and carry Sharpness IV Netherite Swords, axes, shields and three Golden Apples per soldier. General Saparata commands from the rear with his own equipment. Your own Sharpness 5 setting is separate from the Knights’ Sharpness IV swords.
Wemmbu suits this route because his flight equipment lets you leave close combat, his healing supplies support recovery, and his maces provide a finishing option. Choose this approach when you can reliably switch equipment and fly under pressure.
The setup screen warns that more than 50 soldiers can cause lag on phones and older computers. For the mode’s entry and configuration controls, see Simulator battle setup.
Arrange Flight, Healing and Separate Shots
Put the equipment you will switch between within easy reach:
- Elytra and Firework Rockets: leave the enemy group and climb away from the crater.
- Netherite Chestplate: switch back to armor for close engagements.
- Golden Apples: recover after creating distance, including while airborne.
- Totem of Undying: keep one equipped in your offhand for survival protection.
- Crucible: keep the mace accessible for the final fight.
- Multiple Nuke Shots: place one in your hotbar and keep additional copies ready in your inventory.
Wemmbu’s Simulator preview with Netherite armor and Sharpness V includes 64 Firework Rockets and 64 Golden Apples. The bombardments come from separately obtained Nuke Shots, not from a built-in character attack. You can obtain Nuke Shots from the Simulator’s Orbital Box; see Nuke Shots and Orbital Boxes for the acquisition steps and other sources.
Each Nuke Shot has one use and disappears after use. Move another copy into the hotbar for the next bombardment. Check the item’s tooltip: Stab Shot and Nuke Shot both look like fishing rods, so their shape alone will not identify the correct supply.
Practice the Elytra and rocket movement sequence before attempting the full army. This route depends on being able to disengage promptly while keeping your healing and next weapon accessible.
Clear Knights with Aerial Bombardments
Prepare to escape as soon as combat begins. In this 100-soldier Wemmbu encounter, the opening exchange left the player burning and near death, triggering a Totem before aerial recovery. Keep your flight equipment ready instead of committing to a prolonged fight inside the crowd.
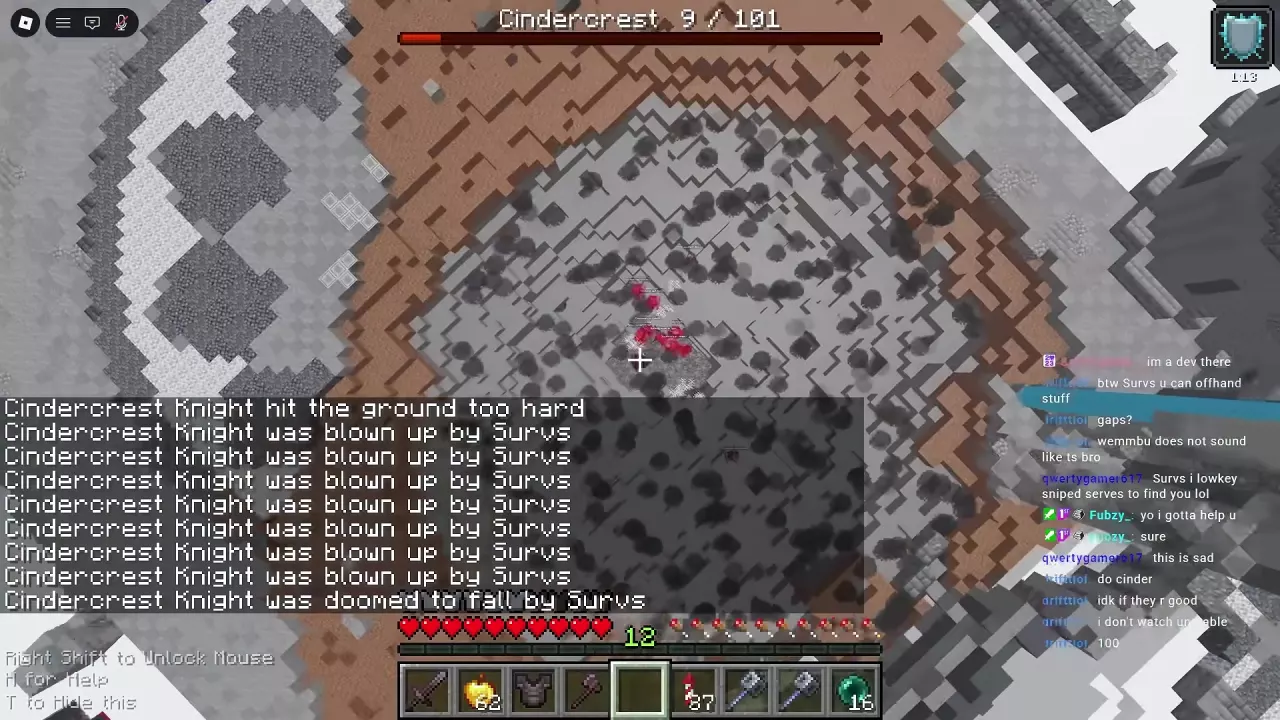
- Get above the clustered Knights. Select Nuke Shot, aim toward the group below, and use it to release TNT over the target area.
- Keep moving as the TNT falls. Use Elytra and Firework Rockets to reposition rather than remaining among the soldiers.
- Recover after gaining space. Eat a Golden Apple while airborne if you have taken damage.
- Ready another Nuke Shot. Take a separate copy from your inventory and repeat the bombardment against surviving Knights.
- Watch the counter and the ground together. Explosions can kill groups and cause fall deaths, but they also tear open the arena. Repeated attacks can leave a deep crater with exposed bedrock.
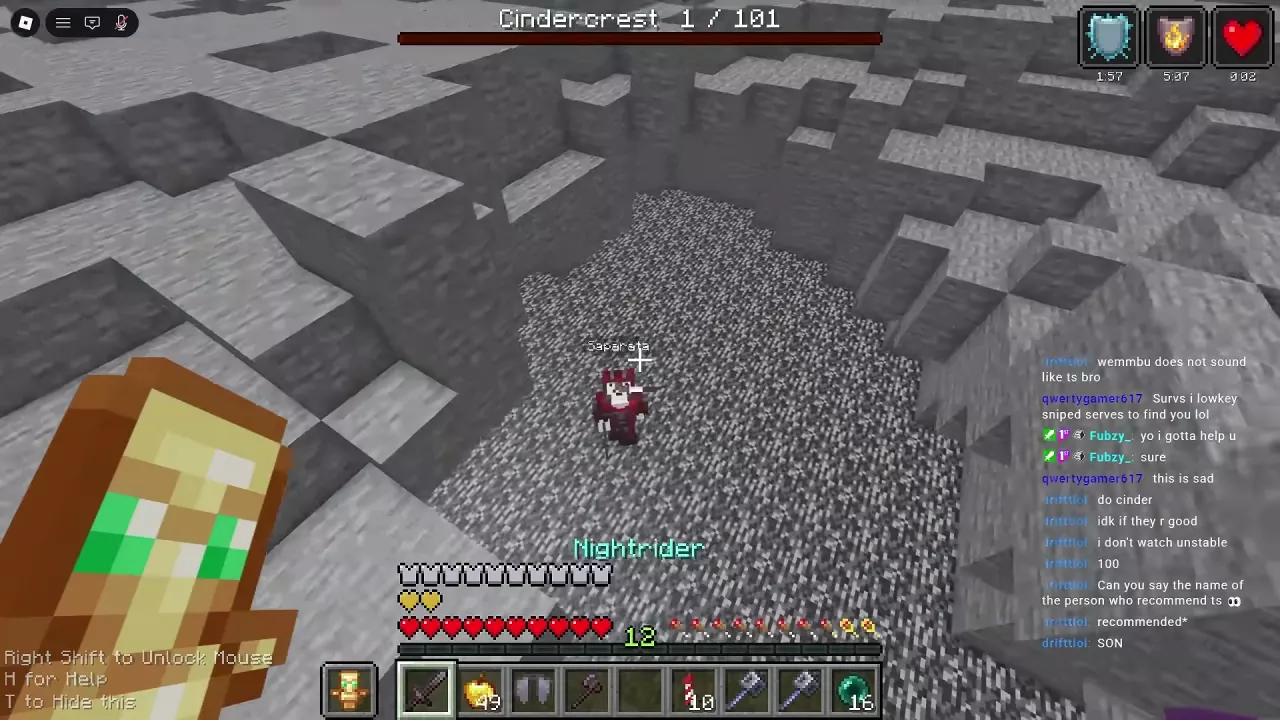
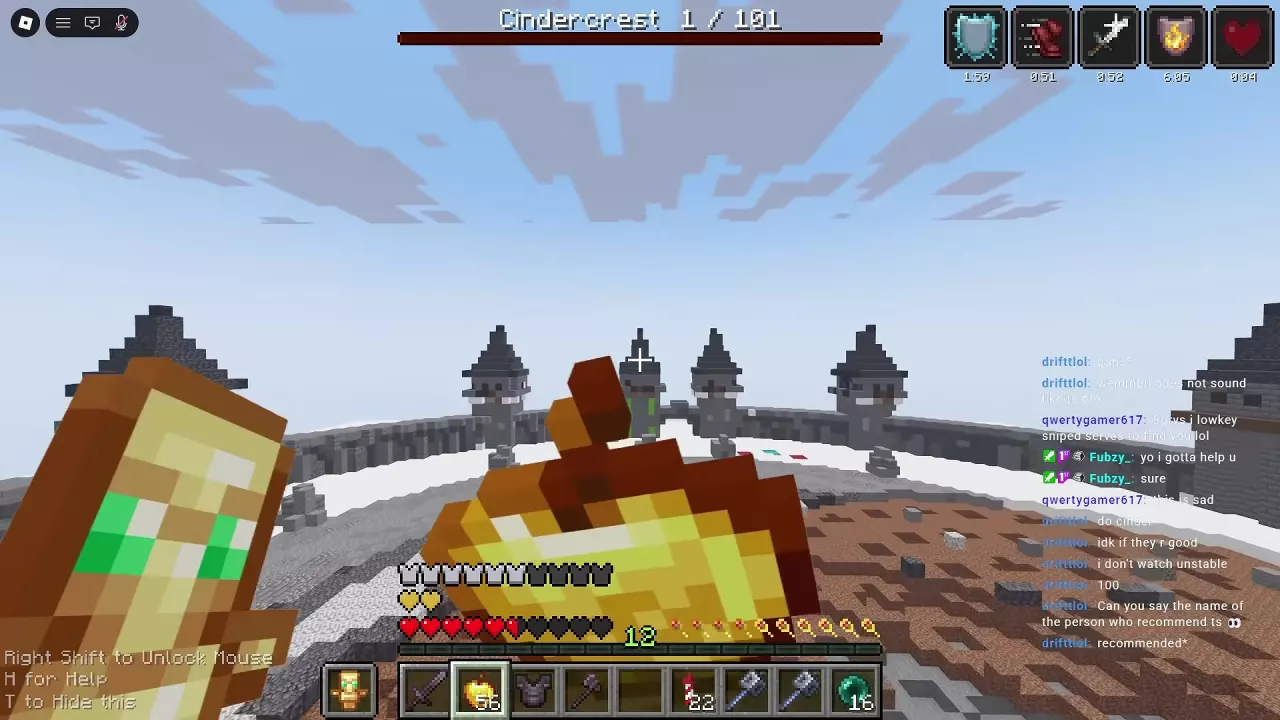
- Locate the remaining enemies before spending another Shot. In the 100-soldier encounter, the final Nuke killed a remaining Knight and lowered the counter from 2/101 to 1/101, leaving Saparata for the final fight.
The best targets are clustered soldiers: one bombardment can affect several enemies in the same area. As the army thins out, aim at the survivors’ current position rather than the original center of the crowd. Keep your escape route in mind as the floor changes; a landing spot used earlier may now be part of the crater.
Fight Saparata in Short Engagements
When the counter reaches 1/101, recover at the crater edge and locate Saparata on the exposed bedrock below. Begin the duel with your healing, flight equipment and finishing weapon ready.
- Approach for a short attack. Use your Netherite Chestplate for the close engagement and keep track of the open space above you.
- Switch to Elytra when you need to leave. Use Firework Rockets to climb out of close range and away from the crater floor.
- Eat a Golden Apple while airborne. Give yourself room to recover before returning to Saparata.
- Return for another engagement. Switch back to your chestplate for close combat, then repeat the attack-and-retreat cycle as needed.
- Finish with Crucible. Keep the mace ready for an attack opportunity after recovering; it delivered the final blow in this solo route.
Saparata can put substantial pressure on this setup: health fell to approximately two hearts during the configured Wemmbu fight before aerial healing restored it. Treat that as a reason to retreat early, not as a health threshold to wait for. A short attack followed by a controlled escape gives you another opportunity to deal damage without staying in a dangerous exchange.
Choose the chest slot for your next action: chestplate for protection during engagement, Elytra for flight out of reach. The armor and Elytra guide explains that tradeoff, while healing and defensive items covers the broader recovery sequence.
Finish the Run and Choose What Comes Next
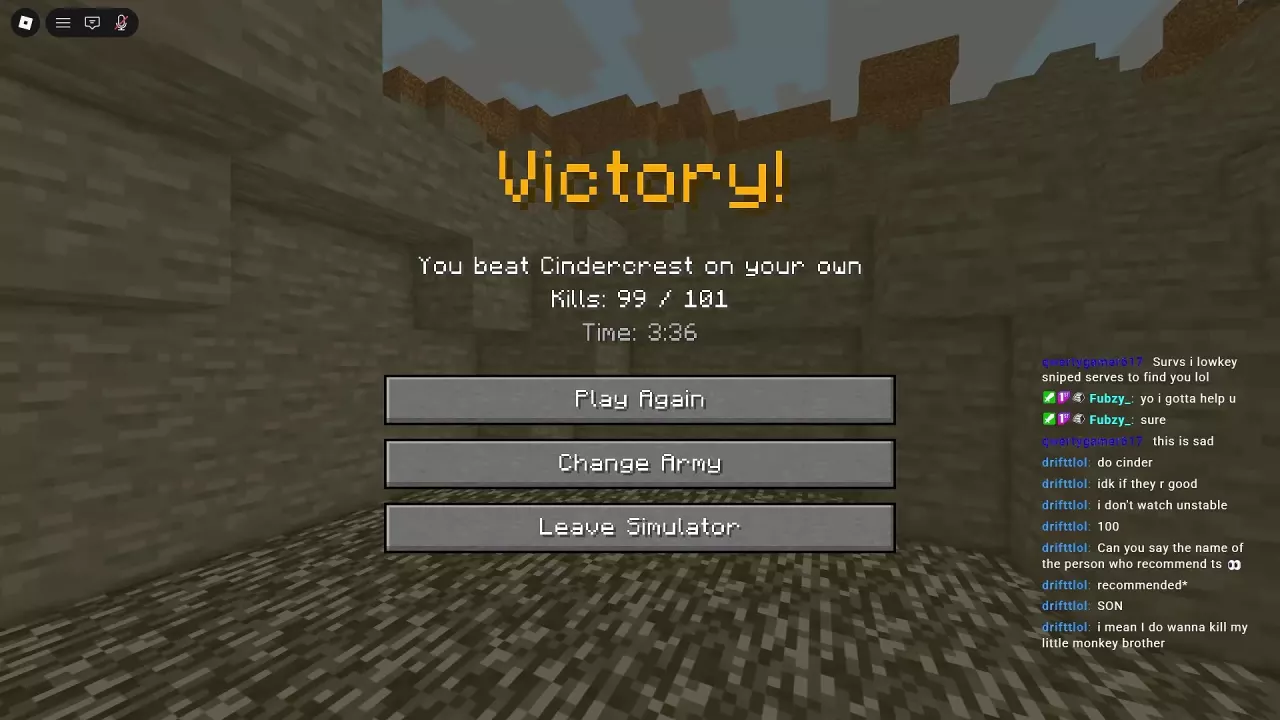
Defeating Saparata completes the solo Cindercrest battle. The victory screen offers three choices:
- Play Again to retry the encounter.
- Change Army to choose another army.
- Leave Simulator to exit the mode.
For another army using aerial recovery, follow the NULL Army and JamatoP strategy. To compare difficulty, armor and generals before choosing, use the Simulator army overview.